
Branded Podcasts: Expert Audio and Video Recording

You've probably already had this meeting. The show concept is strong. The host is credible. Sales wants clips for LinkedIn, leadership wants thought leadership, and demand gen wants the episodes to support pipeline. Then the room stalls on one question: what if the production quality makes the brand look smaller than it is?
That concern is justified. In branded content, buyers don't separate message from delivery. They hear room echo, laptop fan noise, clipped audio, or a camera-angle mismatch, and they make a judgment about operational rigor before they process the argument itself. That's why audio and video recording isn't a back-office production task. It's part of how the brand presents competence.

This guide treats every recording decision that way. Not as gadget talk. As a series of choices that affect trust, guest experience, internal workflow, and how easily your marketing team can turn one session into assets that ship.
Table of Contents
Why Pro Recording Is a Brand Strategy Decision - Credibility is built before the argument lands
Planning Your Recording Before Hitting Record - Build a production brief that removes ambiguity - Plan accessibility during production, not after
Selecting Mics Cameras and Interfaces - Choose gear by failure risk, not by hype - Three setups that fit most branded shows - Lighting treatment and what actually improves quality
Managing Studio and Remote Recording Workflows - When the studio route makes sense - When remote recording is the smarter choice - A simple decision filter
How to Capture Flawless Audio and Video - Lock the recording settings before anyone speaks - Mic technique and framing have to match - What the room and camera setup must do
Ensuring a Smooth Handoff to Post-Production - Redundancy and organization prevent expensive edits - What to include in the handoff package
Distribution Delivery Tips and QA Checklists - Deliverables should reduce friction for marketing - Pre-flight QA before anything publishes
Why Pro Recording Is a Brand Strategy Decision
A lot of teams still treat production quality as cosmetic. It isn't. In B2B, it's a proxy for how seriously you run the rest of the business.
Audio and video recording sits in the same category as deck design, sales enablement, and web experience. If the content sounds rushed or looks inconsistent, the audience assumes the thinking may be rushed too. That's unfair, but it's how perception works. Clean production tells buyers that your team respects their time and can execute with discipline.
The market context matters here. We're operating in the Digital Era of recording, which began in 1975 according to the history of sound recording overview. Professional-quality capture is more accessible than it used to be, but that accessibility cuts both ways. Your audience now expects clarity, stable framing, and polished delivery because the tools are widely available.
Credibility is built before the argument lands
If a guest joins your show and hears their own voice coming back through a badly configured system, confidence drops immediately. If your executive host is backlit, framed too wide, and speaking through a built-in laptop mic, the content feels improvised even when the talking points are strong.
That's why the smartest teams don't ask, “What gear should we buy?” first.
They ask questions like these:
What should the show signal: executive polish, founder intimacy, category authority, or newsroom speed?
What friction can the host tolerate: a simple USB setup or a more controlled XLR workflow?
What does marketing need afterward: long-form episodes, short clips, transcripts, captions, stills, or all of the above?
Practical rule: If a recording choice creates stress for the host or confusion for the editor, it will show up in the final brand impression.
A branded show also has to work beyond the episode itself. It needs to feed campaigns, social clips, sales follow-up, and brand awareness. That's where a structured recording process pays off. Teams that align production with distribution goals make better assets and waste less time in revision. If your broader objective is category visibility, this is the same logic behind strong content marketing for brand awareness.
Planning Your Recording Before Hitting Record
Most recording problems don't start on recording day. They start when nobody decided the format, who owns guest prep, what backup path exists, or how the team will handle accessibility.
The fix is simple. Build a production brief for every session. Not a creative brainstorm doc. A working brief that the producer, host, editor, marketer, and guest coordinator can all follow.

Build a production brief that removes ambiguity
The brief should answer operational questions in plain language.
Include at minimum:
Format and recording mode: solo, two-person interview, panel, screen share, or hybrid.
Location plan: in-studio, office conference room, home office, or remote platform.
Guest tech assumptions: what mic, camera, headphones, browser, and internet setup the guest will use.
Run of show: intro, segment order, sponsor or CTA placement, and likely pickup points.
Visual notes: framing style, wardrobe guidance, background rules, and brand assets on set.
Ownership: who starts the session, who monitors levels, who takes notes, who manages file transfer.
This doesn't need to be long. It needs to be specific.
A strong brief also improves script quality because it forces the team to think in scene changes, transitions, and edits instead of loose talking points. If your team needs help shaping that part, these actionable video script tips are a useful companion resource for tightening structure before production.
Plan accessibility during production, not after
Bolting accessibility on at the end is the expensive version.
According to Section508.gov guidance on synchronized media, 70% of audio descriptions fail because they're added in post-production, and 62% of corporate compliance teams reject video content without these features. The practical implication is clear: verbal speaker identification and short descriptions of important visual information need to be planned into the recording itself.
That means your brief should include:
Speaker identification rules: hosts and guests should identify new speakers when context could be unclear.
Visual description moments: product demos, charts, slides, or gestures that carry meaning should be described during natural pauses.
Caption and transcript intent: note whether the final cut will require clean verbatim accuracy or a lightly edited transcript.
If accessibility depends on the editor “figuring it out later,” the recording team has already made the job harder.
One more thing matters in pre-production: rehearsal. A short tech check catches browser permissions, camera placement mistakes, noisy HVAC, and low batteries before talent is on the clock. For executive guests, that's not optional. It protects the schedule and avoids the kind of first-five-minutes chaos that makes a professional show feel amateur.
Selecting Mics Cameras and Interfaces
Gear decisions should follow one rule: choose the setup your team can operate consistently under deadline. The right kit isn't the most impressive one. It's the one that produces reliable files with the fewest avoidable mistakes.

Choose gear by failure risk, not by hype
For branded podcasts, the main gear risks are predictable. USB mics that get selected as the wrong input. Cameras that overheat or lose power. Interfaces with too many controls for a non-technical host. Rooms that look polished on camera but sound reflective in the recording.
That's why I favor simple, opinionated setups over endlessly customizable rigs for most client teams.
Here's the practical trade-off:
Microphone Type | Best For | Key Consideration |
|---|---|---|
Dynamic microphone | Spoken-word podcasts, untreated rooms, executive hosts | Rejects more room noise, but usually wants closer mic technique |
Condenser microphone | Controlled studio environments, voice detail | Picks up more room tone, so the space has to be well managed |
USB microphone | Small internal teams, fast setup | Easy to deploy, but routing and monitoring can still confuse guests |
XLR microphone | In-house studios, multi-person productions | More flexible and stable, but needs an interface and setup discipline |
If your internal team is still learning the category, this guide for aspiring podcasters is a useful baseline for thinking through microphone trade-offs before you standardize a kit.
Three setups that fit most branded shows
Reliable starter kit
This is for a marketing team recording a host in one location with minimal friction. Use a Shure MV7, a Logitech Brio, closed-back headphones, and a basic key light. The MV7 works because it gives you strong spoken-word performance and a straightforward setup path. The Brio is easy to manage and won't intimidate a non-technical host.
This level works well for internal subject-matter experts, recurring social clips, and shows where turnaround matters more than a cinematic look.
Professional remote guest kit
For senior guests, send a preconfigured kit. A dynamic mic, simple stand, headphones, webcam, cables labeled by color, and printed setup instructions. If you want more control, use an XLR mic with a compact interface such as a Focusrite Scarlett. Reliability matters more than flexibility here.
One practical option in this category is a managed recording platform that supports local and multitrack capture for audio and video interviews. Podmuse's audio interface guide for podcasting is useful if you're deciding where USB simplicity stops and interface-based workflows start.
In-house studio standard
For a flagship show, use XLR microphones, a dedicated audio interface, fixed lighting, locked camera positions, and acoustic treatment that stays in place. Such a setup warrants tools like a Shure SM7B or similar broadcast-style dynamic mic, mirrorless or cinema-style camera bodies, and a Scarlett-class interface. The gain is consistency. Hosts sit down and the environment already supports the show.
Good gear doesn't make a show credible on its own. Consistent operation does.
Lighting treatment and what actually improves quality
A lot of teams overspend on cameras and underspend on the room. That's backwards.
Start with a simple three-point lighting approach:
Key light: your main source, placed to shape the face cleanly
Fill light: softer support to reduce harsh shadows
Back light: separation from the background
Then handle the room. Acoustic treatment and soundproofing are not the same thing.
Acoustic treatment improves what the mic hears inside the room. Think rugs, curtains, soft furniture, panels, and controlled reflections.
Soundproofing blocks outside noise from entering. That's construction work, not a quick upgrade.
For most branded shows, treatment gives a far better return than chasing total isolation. A guest will forgive a normal office backdrop faster than they'll forgive harsh, echoey speech. That's the hierarchy to remember.
Managing Studio and Remote Recording Workflows
The right workflow depends less on ideology and more on who the guest is, how often you record, and what the content has to do after the session. Some shows need premium control. Others need speed and reach.
A side-by-side view helps.

When the studio route makes sense
Studio recording is the right call when the show is part of a broader brand campaign, when guest optics matter, or when the host needs support to perform well on mic and camera. The advantage is control. You set the sound, the lighting, the framing, and the pace of the room.
That translates into cleaner edits and a better guest experience. Executives often relax when someone else handles monitoring, levels, and resets.
A studio workflow is strongest when:
The guest is high-profile: you don't want tech troubleshooting to eat into a short calendar slot.
The content is flagship material: the show will be cut into multiple campaign assets.
Brand consistency matters: every episode needs the same visual and sonic identity.
When remote recording is the smarter choice
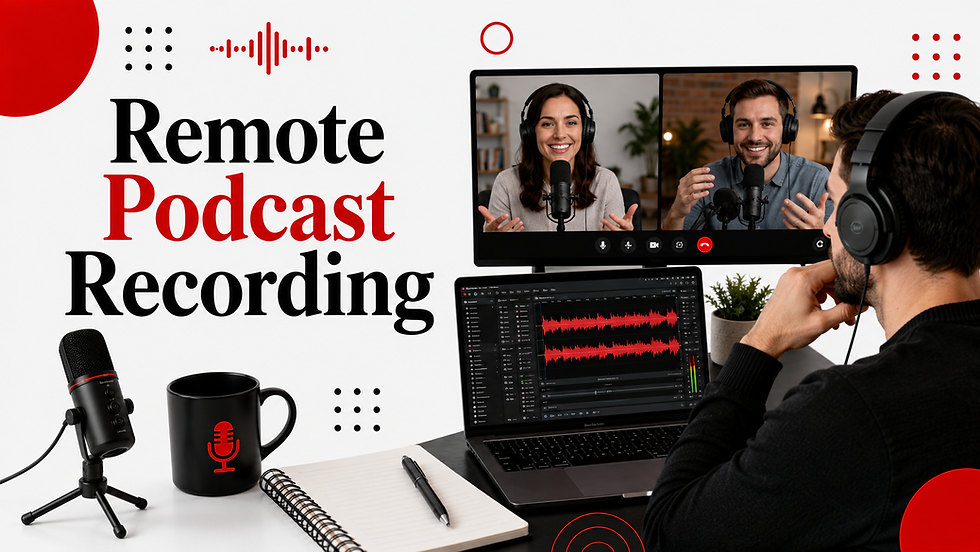
Remote recording wins when access matters more than physical polish. If you're interviewing customers across regions, bringing in subject experts on short notice, or running a higher-volume show, remote often beats studio because it gets recorded.
Platforms such as Riverside.fm and Descript can support a workable professional process, especially when you pair them with a guest tech check, a backup audio path, and a producer who watches inputs instead of assuming the platform caught everything.
Later in the process, a visual walkthrough can help internal teams understand where each workflow creates friction and where it saves time.
A simple decision filter
Use this filter before you lock the season plan:
Choose studio if your host is inexperienced, your guest list is senior, or your team needs repeatable polish.
Choose remote if your priority is access, scheduling flexibility, and broader participation.
Choose hybrid if you can keep the host in a controlled setup while accommodating remote guests.
The wrong workflow isn't the cheaper one. It's the one that creates preventable reshoots, weak source files, and guest frustration.
One more operational note. Remote only works when someone owns the pre-call. Without that, teams end up discovering noise problems, browser conflicts, and framing issues after the guest joins. That's not a workflow. That's hope.
How to Capture Flawless Audio and Video
Once the session starts, standards need to be fixed. Many teams then drift into “good enough” and create hours of avoidable cleanup.
For professional video production, the technical baseline is clear in the University of North Alabama video production standards: record at 48kHz and 24-bit, avoid built-in camera microphones, test audio before the final recording, work in a quiet space with minimal echo, keep the camera at eye level, use an external microphone, and leave a 10-second buffer at the start and end of clips. The same guidance notes that keeping the speaker no more than ~6 inches from the microphone improves signal-to-noise ratio, and that recording the interview two or three times can improve success rates by 30-40% when choosing the best take.
Lock the recording settings before anyone speaks
For branded audio and video recording, 48kHz and 24-bit should be your default capture standard when the footage is intended for video. That keeps the audio aligned with professional post-production workflows and gives the editor workable headroom.
If your recorder supports 32-bit floating point, it's a useful safety net against clipping during unpredictable speech. I treat it as insurance, not an excuse for sloppy gain staging.
Before each session, check these items in order:
Input source is correct. Don't assume the computer remembered yesterday's microphone.
Headphone monitoring works without echo or double-monitoring.
Sample rate and bit depth match the session standard.
Backup recording is armed.
Room noise is identified before the guest starts the answer.
Mic technique and framing have to match
Many branded shows lose authority when the camera says “intimate close-up,” but the audio says “speaker across the room.” That mismatch feels cheap even when viewers can't explain why.
If the frame is tight, the voice should sound close, direct, and present. If the mic is too far away, the room takes over. That's why the ~6-inch rule matters. It doesn't just raise volume. It improves intelligibility and reduces how much bad room sound you capture.
Use these operating rules:
Aim the mic deliberately: slightly off-axis can reduce plosives while keeping clarity.
Keep distance consistent: drifting on and off mic makes editing much harder.
Use headphones during recording: someone needs to hear mouth noise, clipping, HVAC rumble, or a loose cable in real time.
Close framing with distant audio breaks the illusion of professionalism faster than most camera mistakes.
What the room and camera setup must do
Your room should be quiet, soft, and predictable. Turn off anything that hums. Choose surfaces that don't throw the voice back into the mic. If the room is lively, move closer with a dynamic mic rather than trying to “fix it in post.”
For the camera, simple beats cinematic ambition. Place it at eye level. Stabilize it. Light the face before you worry about the background. Underexposure is especially expensive because trying to recover it later often introduces noise and loses detail, which the UNA guidance calls out directly.
A practical checklist for the room and frame:
Eye-level camera: more natural authority, less accidental “security cam” energy
External microphone: never rely on the camera mic for a branded show
Quiet environment: pause for HVAC, hallway noise, or notification sounds
Editorial handles: keep that 10-second pad at the start and end
When teams follow these basics consistently, editing gets faster and the content holds up across YouTube, LinkedIn clips, webinar repackaging, and internal sales use.
Ensuring a Smooth Handoff to Post-Production
Most post-production delays don't come from the edit itself. They come from messy source material, missing notes, unlabeled files, and nobody knowing which take the host preferred.
A strong handoff saves money because it reduces interpretation. The editor spends less time decoding and more time improving the content.

Redundancy and organization prevent expensive edits
Always record redundantly. Capture a local recording whenever possible, and keep the platform recording as backup. If one fails, the session is still usable. If both survive, the editor can choose the cleaner source.
Then label everything like someone else has to understand it instantly.
A naming structure such as works because it answers the editor's first questions without opening the file. Add a spoken slate at the top of the session too. Episode title, date, participants, and whether there were pickups. That verbal marker helps when files get separated from folders.
Useful standards to enforce:
One folder per episode: no loose files in shared drives
Separate raw and processed assets: don't mix exports with originals
Notes with timestamps: flag retakes, flubs worth removing, and standout moments for promo clips
What to include in the handoff package
A professional handoff package should contain more than media files.
Send:
Isolated multitrack audio files
Camera files or local video captures
The production brief
Session notes with timestamps
Brand assets such as music, lower thirds, intro slates, or end cards
Approval notes if the host already marked preferred takes
Transcript request context if captions, blogs, or clips are part of the downstream workflow
If you also need written assets from the session, a transcript should be part of the handoff logic, not an afterthought. This practical guide on how to convert video to text is helpful for teams that want cleaner transcription inputs before they build captions, summaries, and derivative content.
Editors work faster when they receive decisions, not just files.
That's the core principle. The smoother the handoff, the more likely your marketing team gets usable assets on schedule without another round of clarification emails.
Distribution Delivery Tips and QA Checklists
Publishing is where technical quality becomes operational quality. If the final files arrive in the wrong format, captions are missing, metadata is incomplete, or the clip exports don't match channel needs, the campaign slows down. A polished recording doesn't help if delivery creates friction for the team that has to launch it.
Deliverables should reduce friction for marketing
Keep the final package simple and channel-ready. For most branded shows, that means delivering a clean master audio file, a platform-ready video file, social cutdowns, captions, transcript text, show notes, and thumbnail or cover assets in clearly labeled folders.
The internal standard matters more than chasing endless export variations. Pick naming rules, folder structures, and approval steps once, then repeat them every episode.
If your team is building a video-first workflow, this overview of video podcast distribution is useful for aligning episode outputs with where the content will live.
Pre-flight QA before anything publishes
Use a final review checklist before the episode goes live.
Audio check: listen for clicks, abrupt edits, level jumps, mouth noise, or music that masks speech.
Content check: confirm intro, outro, sponsor reads, CTAs, and guest names are correct.
Caption check: make sure captions are synchronized and readable.
Metadata check: verify episode title, description, tags, and thumbnails match the campaign plan.
Visual check: inspect framing, color consistency, and any on-screen text for typos.
Platform check: confirm the right file version is assigned to the right destination.
Don't delegate QA to assumption. Someone on the marketing side should review the publish-ready assets as if they were seeing the brand for the first time. That final pass catches the small errors that make a polished production feel careless.
If you need a team that can handle audio and video recording, guest coordination, studio or remote workflows, post-production, and distribution without adding operational drag to marketing, Podmuse is one option to evaluate. The agency works with brands on end-to-end podcast production and can help define the recording setup, workflow, and delivery process that fits your show.


header.all-comments